Quick Design Workflow
Choice #1:
Create a picker from an existing picker template. 3 ways to create a picker from the template:
ALT+LMB double-clickon the free space of the tab area, or the empty space of the picker area if no picker has been loaded.Use the
CTRL + ALT + Nhotkey.Select the menu
Picker / New Picker From Template.., and select a picker template, input a picker name, and hit theOKbutton, you will create a new picker from the template.
Choice #2:
Create from scratch but utilizing several on-click features:
Create a new picker file. Use hotkey
CTRL + N, orCTRL + LMBdouble clicking on the free space of the tab area, or select the menuPicker / New Picker.., to create a new picker file. There will be a panel by default in the new picker file.Snapshot picker panel background image. Make sure you are in the edit tool:
 LMB click on the top right triangle of the panel title area, Select
 1. Prepare Snapshot.
This sets up the resolution gate of the 3d view, also if there are children items in the panel, a snapshot of panel content will be made and set as the image plane of the 3d view, serving as a reference.
Tweak the 3d view, and prepare to take the background snapshot image for the picker panel, usually, you wanna use the front camera to do this.
Select2. Snapshotto take the snapshot and set the background image as the picker panel.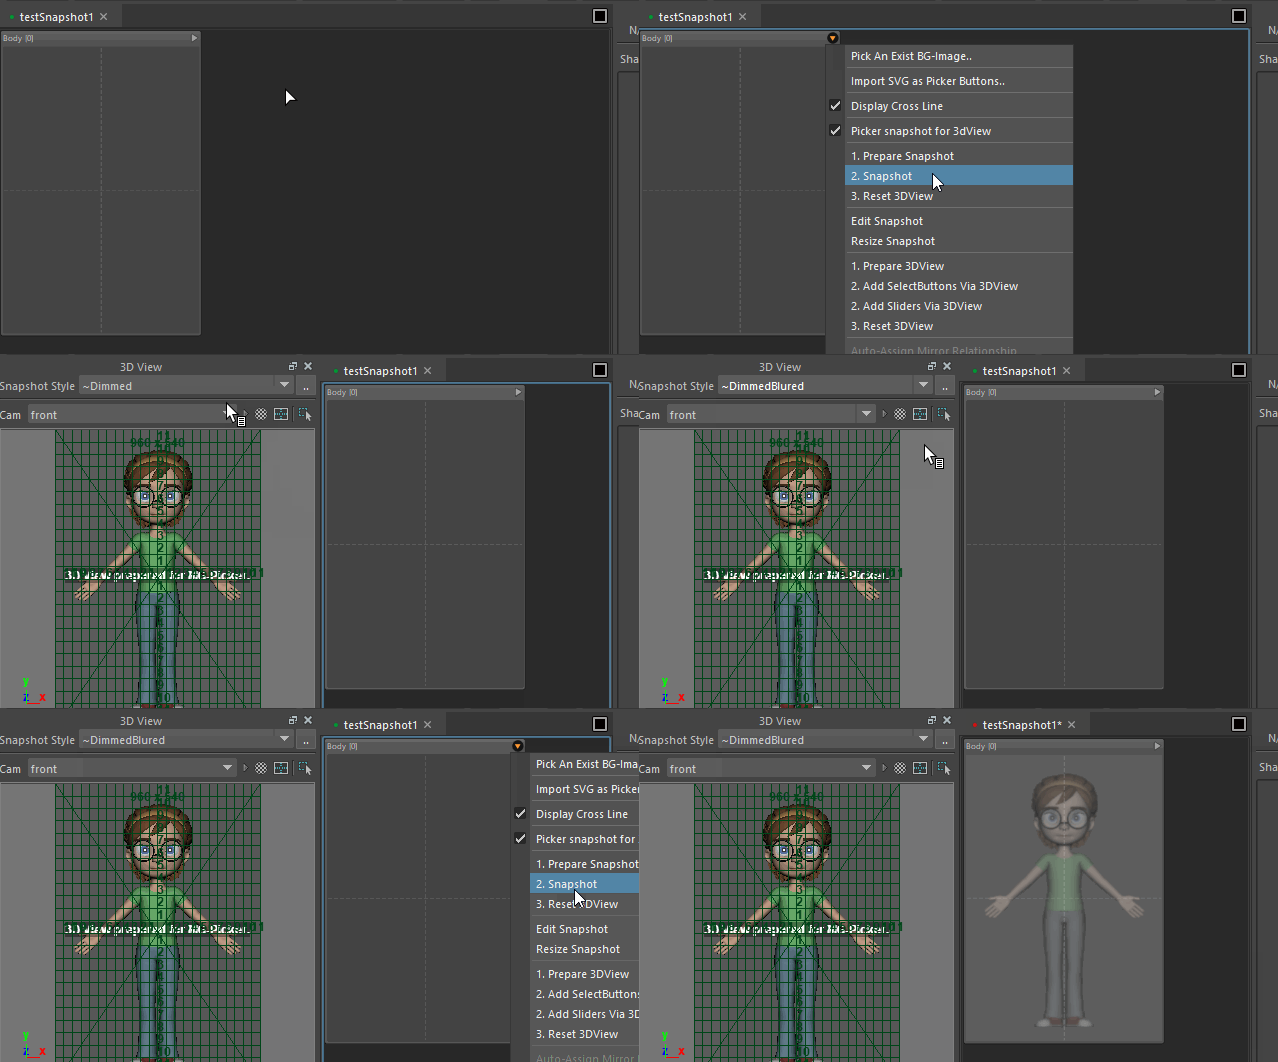
1-Click create picker select buttons. Select the controls you wanna created as a picker select button.
LMB clickon the top right triangle of the panel title area, and select1. Prepare 3D View, usually you wanna use the front camera to do this. Tweak the 3d view, so that all the controls are visible in the 3d view. Select2. Add SelectButtons Via 3DViewto make all the select-buttons.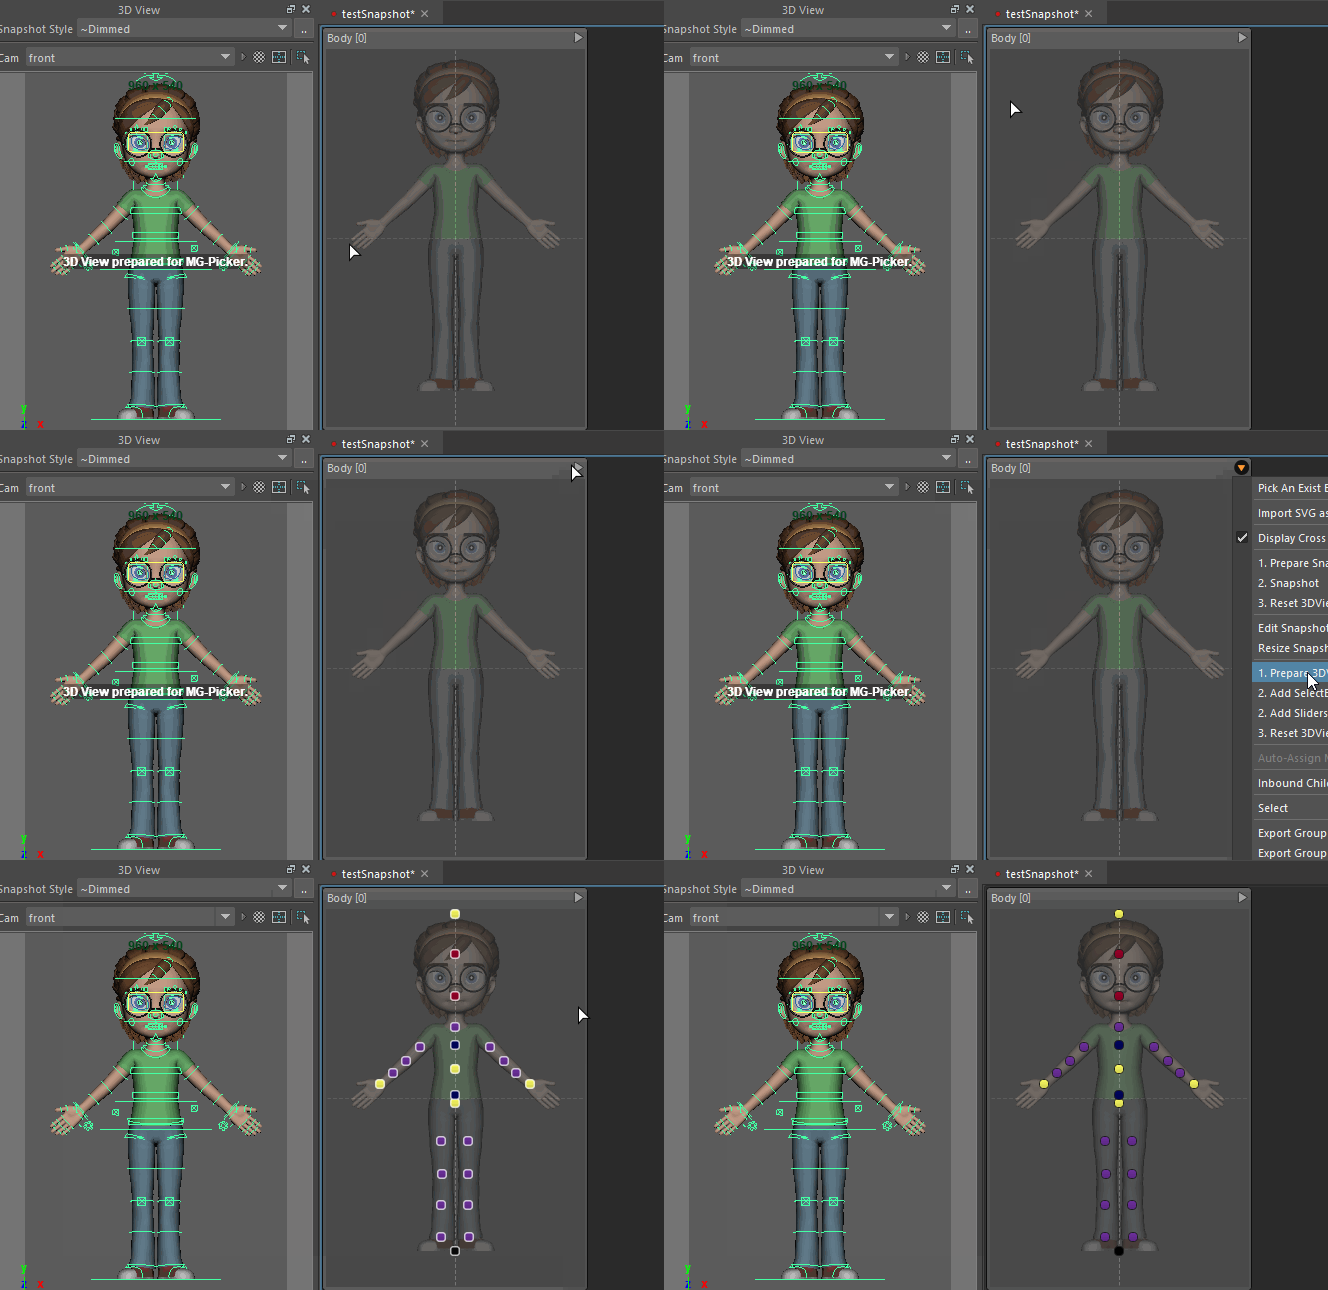 Move items to make sure they are not overlapping with each other.
Auto-Labeling: Select the select-button and press
CTRL + Lto auto-label them.Link the select-buttons and set up the mirror relationship. Use the
 tool to link the select-button together, so that in the future animator could double-click the parent select-button to select all the child select-buttons members.
Use the
tool to link the select-button together, so that in the future animator could double-click the parent select-button to select all the child select-buttons members.
Use the  tool click on each pair of select-buttons, and mark them as mirrored buttons.
You could also frame-select the buttons at one side, and right-click on them, select
tool click on each pair of select-buttons, and mark them as mirrored buttons.
You could also frame-select the buttons at one side, and right-click on them, select Auto-Assign Mirror Relationshipto do the job. There are many advantages to always assigning the mirror relationship: In the design phase, move them reflectively, in animator mode, mirror selection, move the slider handle reflectively, etc.Add Command Buttons. With
tool or the command-button tool  , right-click on the view, select
 Add Command Buttonand select a command button preset to create a command button. Usually, you add the select all button, key all button, etc.1-Click add Pose Command Buttons.
You could add pose buttons, which are just command buttons with images. With the tool or tool activated, right-click on the view, and select Add Pose Command Buttonto add a pose button without a thumbnail. Or selectPose Command Button With Icon, prepare the 3d view, and snapshot and create a pose button with an icon.1-Click create picker sliders for your facial panel. You probably need to create a new picker panel for the facial sliders. Use hotkey
CTRL + SHIFT + Nto add a new panel. Select all the controls in your NURBS-curve-based facial panel,LMB clickon the top right triangle of the panel title area, Select1. Prepare 3D View, and tweak the camera view so that all curve sliders are visible in the view. Select2. Add Sliders Via 3DViewto make all the sliders. Move the overlapping sliders to lay out all the sliders, and alsoCTRL + Lto auto-label them. Repeat step 4 on these sliders, to link them, and mark the mirror relationships.Edit, tweak, test, and done! Switch to the preview tool
 to test all the button interactivity.
Press
to test all the button interactivity.
Press F8to switch to real animator mode, but it is risky because in that mode the unsaved edit is not savable and will not be warned when you close the picker.